
Showing posts with label Maya. Show all posts
Showing posts with label Maya. Show all posts
Monday, 6 May 2013

Friday, 1 March 2013
Here's the rest of the props, textured for the room: tried to make the small balls look like the 20p bouncy balls you get out of machines at corner shops . i always liked getting the marbled looking ones. i would pretend they are little planets. The larger is a plastic inflatable ball with the logo from a popular tv show in the kids world. Something i always see kids have are balls with cartoon branding or characters on. A popular Cartoon show that our tutor's young son watches is Ben 10. Seeming as i can't use the logo or branding i substituted it with something similar but different so people may see the connection as a popular television show. Children seem quite influenced by television shows, their environment and the people and things they have connections with. I gave the larger ball an almost lava like texture print that would be reflected in the texture design of the Boy's monster character.


Here is a teddy i modled and textured. I am still a bit unsure about the bump map for this but i wanted it to seem more soft with shorter fleecier fur than fluffiness. i got inspiration from an old teddy i had as a child which also had a similar texture.


I quite like the way the bed turned out. The posts have a more Ikea style veneered wood feel to them than real wood. Thedirectore said that they should have a wooden feel to them but due to some difficulties i encountered with the uv mapping i ended up using a uniform wood texture in photoshop instead of manually texturing the bedposts them selves which would have taken a lot more time in which i could do other things. all in all it ended in an agreeable realistic effect. the bed covers are my favourite textured bit. I used photos of my own bed sheets to create a realistic textured feel to the sheets.

Hotwheels inspired toy racing cars.

Matching "Ikea-style" drawers.

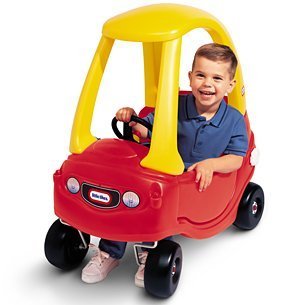 Toybox texture inspired by the plastic Fisher-Price Red and Yellow toy buggy car things that i remember toddling about, Flinstone style. It always held a place in my mind for the plasticy rough but smooth almost rock like, nobbly texture that didn't seem to fit anywhere else other than fisher-price toys, plastic wendy houses and small outdoor jungle gyms. So i thought it would be appropriate, bearing in mind the kids' ages, to make the textures for toy box in this vain(and use of primary colouring).
Charlie. :)
Monday, 10 December 2012
Semester 1 Summary: Slava's Models
It's Chrimbo, so I'm sticking up "round up" posts for all the stuff i've done this semester. This post is all about the models i've done for this film only: Waddles the 6 headed beast, a rag doll easter egg and wellies.
Wings for Waddles:


These are the Calum's designs which i used inside Maya, while modelling
And these are the results:


As for Waddles himself, here's the run-down:
This is Kirsteen's character design which i tried my best to stick closely to while modelling.


I took note of Chris' comment on my model before it was entirely finished:; that i could emphasise the weight on it's back end more with a bend in the legs, he looked far too spritely, so baring in mind the bend in the back leg that hippo's demonstrate i added it to my model.


Jess Doll: This is my turnaround for Jess Doll,

based, of course, on my character design for our 3rd year film "Jurassic Jess"

Turning our little girl into a doll involved thinking about what she'd be full of: i.e. stuffing, or beans or fluff? I settled on quite a weighty look, inspired by my own concepts from 3rd year, i always drew her bunches and jumper with weight.

I decided to construct her like a beannie baby doll, sitting on her butt, bent over with weight and dangley arms and legs. Laika's Coraline was the inspiration for her button eyes, a slightly sinister twist! I had in mind, a doll that looked hand made and old and used, not new and shiny, so the buttons were an indication of that. the throw back to Coraline emphasised the "hand made" nostalgic feel i think stop mo. has.

This is a side character from Pixar's Toy Story. In the future i plan to sculpt texture into Jess' hair in Zbrush, and this is exactly the texture i'd be going for; thick wooly ropes.


 The kids' wellies I modelled as "clutter props" for the kids' bedroom started life as Jess' wellies, but i then change their shape to match more with realistic, existing, children's clothes. My final model was also textured by me.


Tuesday, 27 November 2012
Waddles' finishing touches!
I call him Waddles, because i can really imagine him walkin' funny. But this should hopefully be one of the last modelling progress posts for Ellie's Monster, formally "Monster 2".

Wings!

i looked at some reference of how one would rig a wing before i started modelling but soon realised Calum's design was very simplified and would not require all the joints shown above, however, this bird wing reference did come in handy when i was building the more realistically drawn Evil fairy wing: see, below.


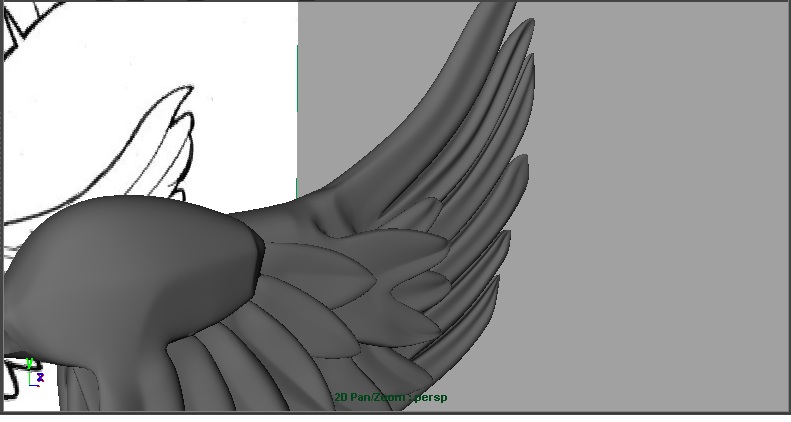
Before starting the Evil fairy wing i looked at the bird wing rigging reference (above) and images of bats, as the joint structure is clearly evident through their thin wings.

I started by creating and duplicating 8 cylinders

I shaped them t match the bones in Calum's drawing

I joined them together and added topology to make the spikes seem as if they were pushing out through the flesh surrounding the bone


The Fairy wing was created using a similar process to the Evil fairy wing


P.S. The inside mouths for all of Waddles' heads are also complete now.
Subscribe to:
Posts (Atom)